 One way to shine in a slow or competitive housing market is to create a good first impression. According to home-selling experts, and home stagers like myself, I have some quick tips for speeding up this process. Think about burning candles during open houses, filling the home with the aroma of fresh-baked cookies and hanging a wreath on the front door. Home-improvement experts say that investing in new kitchen countertops or a bathroom remodel will give the home a whole new look and that you will most likely recoup your entire investment, if not more. A quick fix can make a significant difference but you don't have to spend a fortune, say experts at lighting control manufacturer Lutron Electronics. An inexpensive yet effective way to increase a home's curb appeal while adding value for its next owner: Add dimmers in key rooms of the home. Priced from just $10, dimmers can completely change the look and feel of a room while adding ambiance and creating moods, not to mention saving energy and increasing the life of your lightbulbs. Plus, your listing can include a mention of your dimmers, to differentiate it from the rest. Dimmers can improve the mood in large and small homes. Cramped for space? A dimmer turns a family room into a home theater, a homework station and a workout room, while an eat-in kitchen can be transformed into a romantic dinner-for-two paradise, just by adjusting the lights. Want to really be a standout in your market? Add a wireless, whole-home lighting control system that lets you turn lights on and off from the car, your bed, the patio or any room of the home. This type of system significantly increases home value while providing added safety benefits, such as tying in with a security system. Adding dimmers is truly a quick fix, requiring less than 15 minutes for installation time. If you run into trouble, help is just a phone call away; Lutron offers a free, 24-hour/seven-day technical support center. Dimmers are available nationwide at home improvement centers and lighting showrooms. #homesforsaleinFlorida #homestagingtips #interiordesign #homedesigntips #housesforsale #realestate #lighting 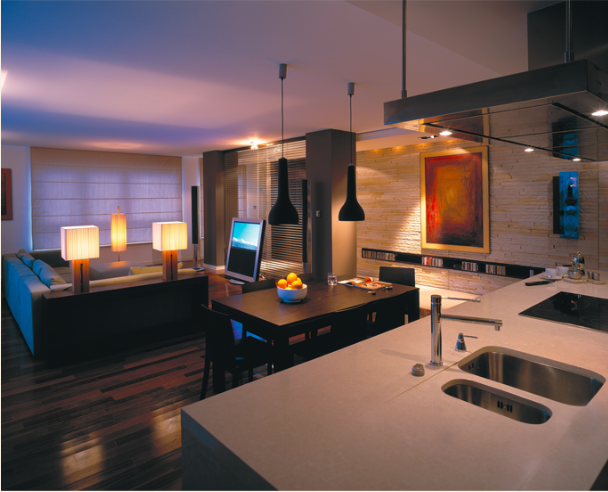 Photo Courtesy of Lutron
0 Comments
Quick Home Painting Tips
3/11/2022
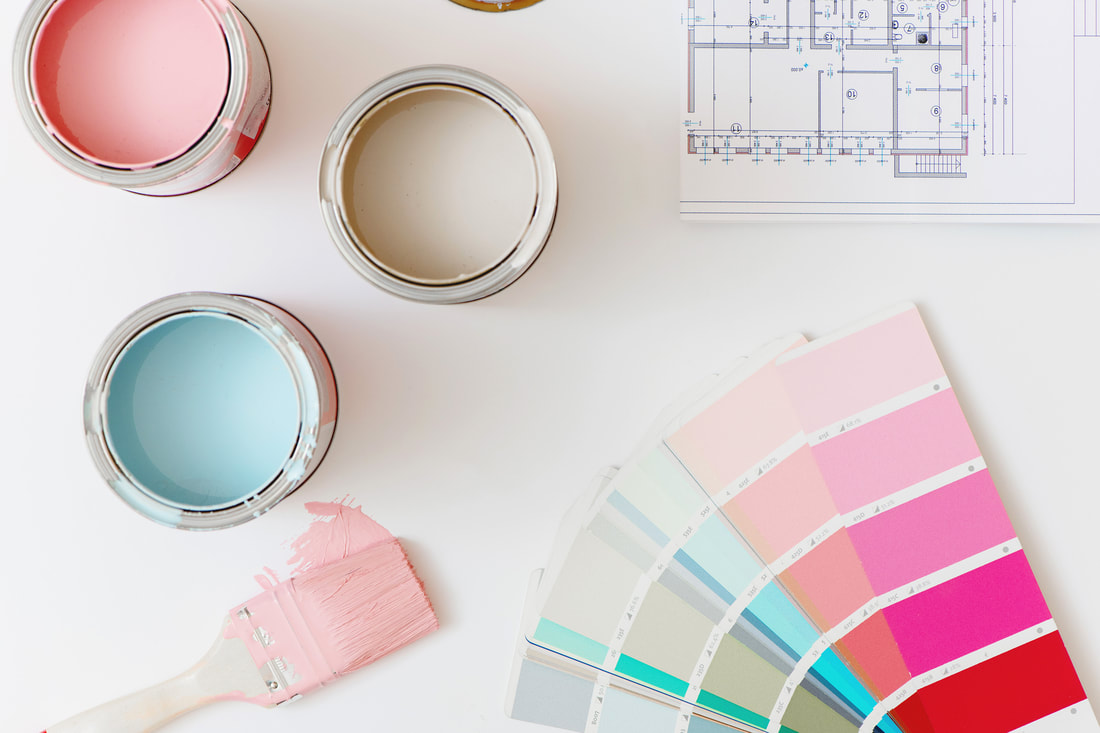 *This post contains affiliate links A new coat of paint can refresh and revitalize any room in your house. Paint is also a very cost effective way to change the look of a room. The best part about interior painting is that almost anyone can do it all you need is the right material and a little bit of knowledge. Painting Supplies Your supply needs will vary depending upon the room that you are painting and the type of paint that you are using, but here is a basic list to get you started: Paint After you choose a color, you will also need to choose a finish. The finish determines how shiny the paint will be. Choices include flat, eggshell, satin, semi-gloss, and gloss. Flat finish is hard to wipe clean and should only be used in low traffic areas that will not attract dirt. Satin, eggshell, and semi-gloss finishes are easy to wipe clean and can be used almost anywhere. Gloss finish is very shiny and is best reserved for small areas such as trim or molding. Paint Applicators Paint rollers and brushes are necessities. A good paint roller can paint an entire room. Choose one that has a fair amount of nap to it-- the thicker the better. When it comes to brushes, everyone has their own individual preference. A small angle brush works well for trim and corners. A three inch flat brush or a paint pad will work well for the places that a paint roller can not reach. Miscellaneous Supplies In addition to paint and paint applicators, you may also need drop cloths, cleaning rags, paint trays, spackle, sandpaper, and a putty knife (if your walls are damaged and need repair), and a ladder or stepladder. The ladder will need to be sturdy and stable to support your movements. Try choosing a ladder with a wide base or a flared bottom like on a Little Giant Ladder. Painting Tips When painting, the most important thing you can do is take your time. If you move too fast, things could get sloppy. Also important, is the prep work. Your painting project will go much smoother if you are properly prepared prior to painting. Here are some tips that can help: 1. Make sure that you have everything you need by organizing all of your supplies before you start painting. 2. Protect your furniture from paint splatters by moving it or covering it up. 3. Use low-tack masking tape to tape off baseboards and trim. Remove the tape before the paint dries. 4. Paint the walls before painting trim or woodwork. 5. Do not apply a second coat of paint until the first coat has dried.  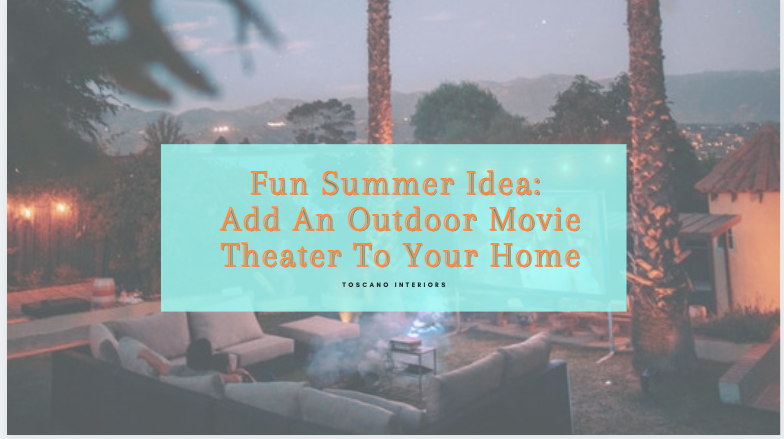  This week's blog post is courtesy of Karl Kennedy with Projectortop.com. He has you hooked up with how to enjoy your summer nights by creating the BEST outdoor movie theatre!
Watching a movie on the big screen is always fun, whether you’re by yourself or enjoying a good film with company. But sometimes, it’s rather inconvenient traveling to the theaters and spending all of that money on a cinema experience. What if we told you that there’s a way to avoid going to the local theaters? All you have to do is install your own personal outdoor movie theater in your backyard! It’s perfect for the summer months, it’ll save you money, and over time, the backyard cinema will have paid for itself. Let’s not forget that having a movie theater at home gives you the utmost comfort and privacy. You also won’t have to choose from the movies that are currently being offered, like at the movie theaters. You’ll have the opportunity to put whatever it is you want to watch on the screen. And, before you get too worried, know that the process of buying the equipment and setting it all up is a lot easier than it sounds. It’s even easy to stick to a budget if you do your research. An outdoor home movie theater can be as simple as a projector and sheet combo or it can be as boujee as a large outdoor screen, receiver, and speaker mix for the best audio and video quality. Enough jibber-jabber, let’s get into explaining the core components you’ll need to pull your at-home, backyard movie theater together. Projector Buying a projector is the better movie, especially when compared to bringing your flat screen television outside every time you want to view a movie. Purchasing a projector will absolutely “wow” your guests every time they come over. It’s bright enough to showcase any movie as soon as the sun sets, but keep in mind that it won’t do too good in the daytime.The visuals once the dark sets in are impeccable, to say the least. Just remember that items like the projector and similar technological equipment should not be left outdoors all the time; the rain and other conditions could always temporarily or permanently ruin the technologies. Projector Screen Projector screens aren’t necessarily needed, but they definitely come in handy. Many first-timers will use the side of their house, primarily because it’s a free alternative to a screen. However, we do not recommend it in the least. Movie screens are supposed to be smooth and color free, and we can guarantee you that the side of your house is anything but that. If you’re looking for a more affordable solution, you can definitely purchase a large white sheet and hang it up; you’ll get decent viewings. But, you’ll have to try your best to keep the sheet wrinkle free and secure it to something. The wind can technically cause the “screen” to move, and that’s highly inconvenient in the middle of watching a film. Honestly, buying a projector screen is your best option. Plus, it comes with a sturdy frame to avoid any blowing over. Media Player Now you need to think of how you’re going to watch the movies. Sure, you can always resort to a DVD or Blu-ray player, but streaming sticks are way more magical. Not to mention they connect directly to the projector, pick up Wi-Fi fairly quickly, and have a plethora of movie options to choose from. Speakers Good audio is a must when it comes to a great outdoor movie theater set up. To get you started, the projectors have minimal speakers, but they don’t work very well. If you’re looking to use the built-in speakers, you should plan on only having a couple people over to view the movie. If you would like to be the host for the evening and have a big group of friends or family over, it’s best to get larger speakers. The additional support is much appreciated. Think about it this way, a big screen deserves big noise, it’s the best scenario. And, if you don’t know what specific speakers to purchase, just head on out and ask a professional to get the best, most extraordinary experience with your at-home, backyard theater. Tips for Creating an Optimal Home Office
6/29/2021
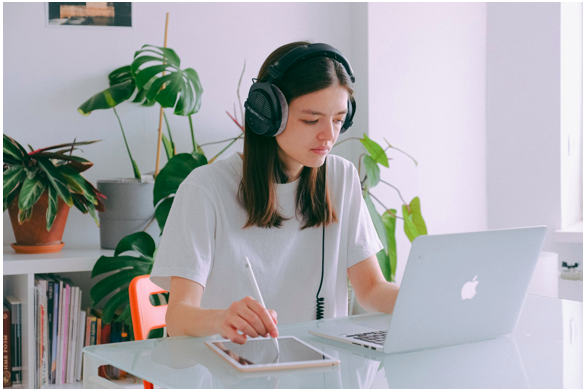 Image courtesy of Pexels Image courtesy of Pexels This week I am excited to share a special guest post from one of our favorite contributors, Alice Robertson of Tidyhome.info She shares some great tips on how to create an optimal home office!
Do you work from home full- or part-time? If so, a place where you can work comfortably and productively is a must. Even if your workspace is just a go-to for your side gig, designing it properly will keep you going strong. The following tips and resources will help you create a home office with your personal and professional success in mind. Places and Spaces Choosing the right spot to work can make a big difference. For the best energy and focus, think about the following components:
Solutions for Your Space Sometimes the ideal workspace doesn’t present itself right away. You might need to do some additional tweaking to work things out.
Creature Comforts Physical discomfort will get in the way of your productivity, so ensure peak performance with a few ergonomic essentials:
Safe and Sound The last thing you want is to put your household or livelihood at risk. There are plenty of great ways to resolve security issues for your home office and provide peace of mind.
Whether you’re hitting the daily grind from home or just picking up a few hours here and there freelancing, your home office should be set up for success. Optimize your productivity and comfort with these simple tips and resources. 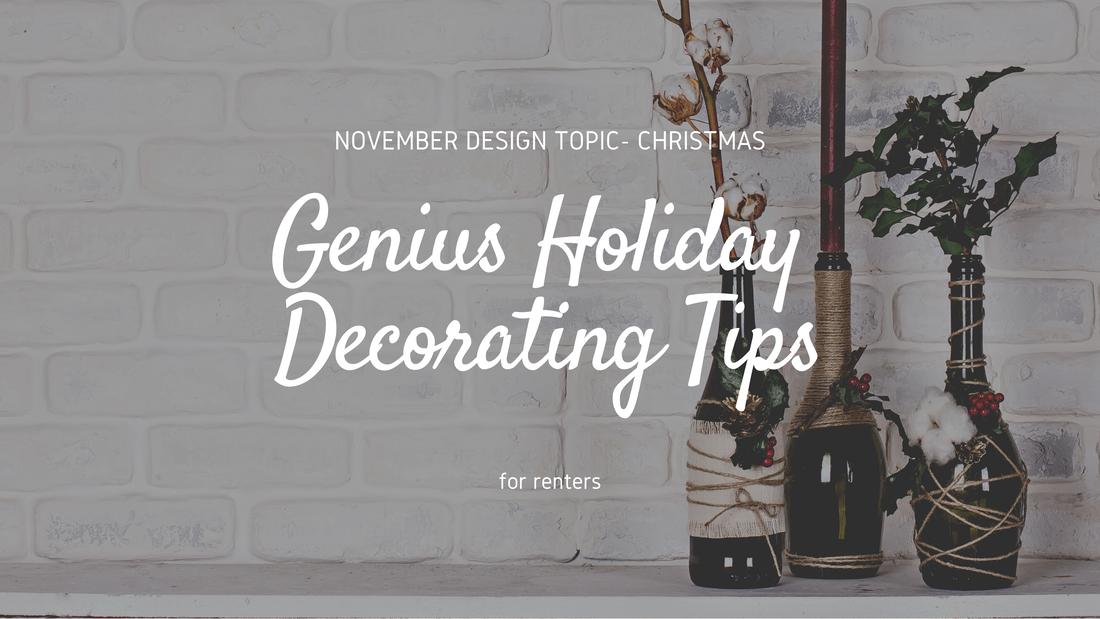  It's November, and how fitting this next blog post is, which just so happens to be a guest article, from Jim Williams, with On-Site Property Management. For the month of October, my design topic was 'Planning For The Holidays'. Keeping along that theme, but incorporating November's topic, 'Christmas', Jim shares with all of you some great holiday decorating ideas...for renter's. The holiday season is the time of the year when people are able to spend the most time with their family and friends. That’s when neighbors are friendliest, there are lots of gifts, plenty of food to share, and time away from the daily stress of life. And the buildup to the season is just as enjoyable as the holidays themselves; half the fun is the excitement of decorating your home. Many people relish the chance to go back to being children for just a few days of the year. But when you live in a rented home, your experience may be a little different from the experience of someone living in their property. You are somewhat limited in the options you have for decorating the house, condo, or apartment. You have to think about how your decorations could damage the landlord's property or affect other people in the building. Landlords are usually wary of tenants hanging ornaments on their property and often include this in the lease agreement. From the point of view of a tenant, this clause could put a damper on your decorating ideas and make the holiday season a little less enjoyable. But from an owner's perspective, there are good reasons to do this. Allowing tenants to put nails in the walls of a rental will damage and devalue their property. But just because your landlord has placed limitations on what you can do when decorating the home, he or she has not barred you from decorating altogether. There are things you can do to get your home into the holiday season without violating the property owner's restrictions. Here are some important considerations and tips for when you are putting up holiday decorations in a rented apartment. Keep your neighbors in mind This is particularly important when you live in a multi-family rental or a condo. You have to think about how your decorations will affect other people in the building. But even if the rental is a single-family dwelling, considering neighbors' well-being is still important. As a general rule, it is best to avoid decorations that obstruct pathways, disturb the peace, or anything that could fall on people. Be careful of motion-detecting ornaments that play music when someone passes, putting decorations on your balcony railing (they could fall and hurt someone), as well as low-hanging decorations that block the way. Avoid fire and injury hazards Decorative lights use electricity and that makes them a risk. There is a huge chance that your lights could start a fire or shock somebody. There is also a possibility that lights that are not firmly secured can get dislodged and become a tripping hazard. The first step to ensuring that your holiday lights are safe is to buy quality lights; the cheap stuff may not have passed quality control. If the lights are going to be hung outside, make sure they are rated for outdoor use. Before you hang the lights and switch them on, make sure to test them first. Do not damage the walls and doors Many tenants take issue with their landlord's refusal to let them hang things on the walls using nails. They feel they are left with no way of placing their pictures, ornaments, or decals on the walls of the rental. But this is only because people assume that the only way to hang stuff on walls is by using nails. There are lots of options for placing decorations on the walls, doors, and, windows which do not involve making holes in the property. Here are a few of them.
We hope these tips will give you some holiday decorating ideas to enjoy your holidays in your rental. Have fun! #holidaydecoratingtips #decoratingtipsforrenters #homedecoratingtips #homedecor #renters #decor #interiordesigntips #designtipsforrenters #coloradospringsdesigners #homedesignerscolorado #Novemberdesigntopic  $1 Store Halloween Goodie Bags
9/27/2020
 Fall is here, and while many of us are working from home + homeschooling, looking for something creative for the kids to do, well the Toscano family has a fun and easy craft for you... courtesy of the $1 Tree! We recently celebrated my Fall Open House at Toscano Interiors, and to make the occasion extra special our daughter, Harper, helped make these fun goodie bags for my customers who attended the event. To make these simple bags we picked up the following from our local $1 Tree Store: * Paper Lunch Bags * Felty Halloween Stickers * Halloween ribbon * Rolls of felt- purple, green, white * Sticker jewels * Brown Bakers twine * Monster Googely Eyes Then we used some patterned orange craft paper we already had from Michaels, patterned scissors, hot clue, Tacky Glue, and of course...buttons *eyeroll* (refer to previous blog posts about buttons) We created pumpkins out of the craft paper and green felt. Made ghosts with the white felt and googley eyes...we just let our imagination run with it. Your homemade goodie bag can be as simple or as a decorated as you want. Place your treats inside the bag. Fold the top of the bag over, and use a hole punch to punch through the folded layers. Thread some raffia through the holes, and tie it to secure it. Repurpose old newspapers. Fold a sheet of newspaper into a pouch, and secure it with clear tape. Use craft glue to affix Halloween-colored notions and trim to the front of the bag. This package is best suited for flat treats like stickers and notepads. If you’re looking for something a little fancier to wrap your treats in, make a felt favor pouch. Again, the $1 Store has rolls of felt you could use. Use pinking shears to cut out a long, rectangular piece of felt. Fold the felt in half, and use hot glue to join the two sides. Decorate the front, using scraps of felt indifferent colors. Braid a handle out of yarn. Cut small slits in each top corner. Thread the handle through each slit, and tie to secure. These goodie bags were a huge hit, something that just adds to the touch of shopping small and local...and it gave our 6 year old something new to do one afternoon while hanging out with mom at her store. 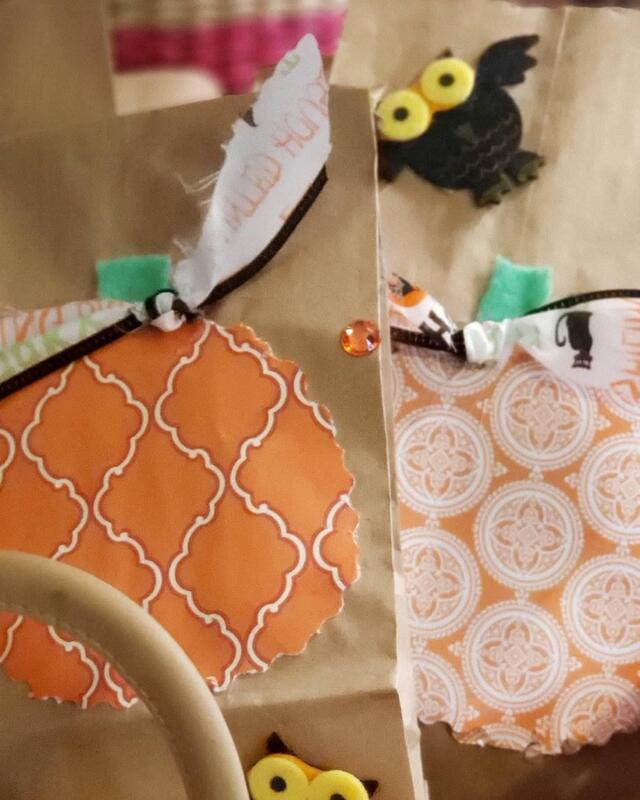 Some of the bags Harper created for the event |

Designer, Life Coach, + Realtor - Candance Toscano"You can design the life of your dreams and acquire that luxurious, fulfilled and empowered lifestyle you know you have always wanted." Archives
March 2024
Categories
All
|
 RSS Feed